I love the look of a good sugar flower on a cake. There's something magical about seeing a shiny, pretty flower on a cupcake or cake, especially one you can eat! Unfortunately, having all the tools is expensive.
In this tutorial, I'm going to show you how to make Sugar Cherry Blossoms without a cutter.

What you'll need:
- Gumpaste (or fondant - like this easy recipe)- Small scissors
- A thin tipped paintbrush
- Coloured Luster Dust
- Exacto-Knife
- Pestils
- Colour Gel (optional)
Instructions:
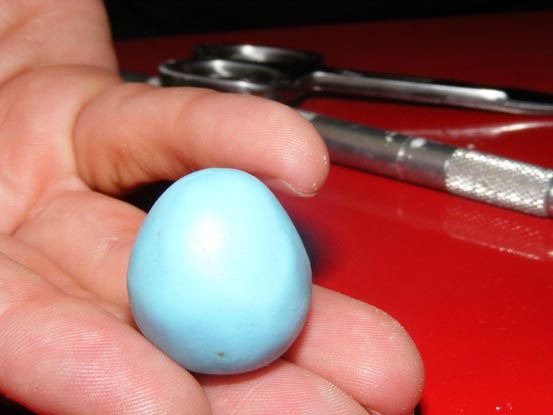
First, take a small ball of fondant/gumpaste and roll it into a cone/egg shape. Make sure there are no creases or folds, and that the cone is smooth. Here I'm using fondant.
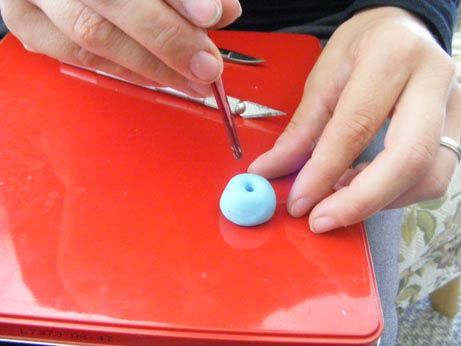
Next, using the end of the paintbrush, poke a little hole in the centre of the cone.
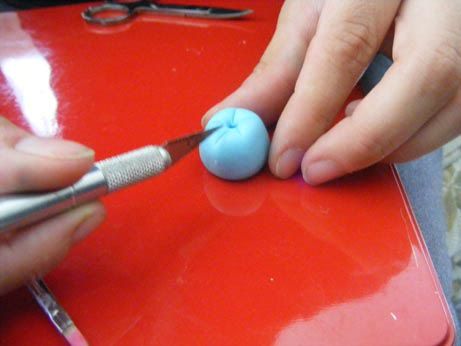
Using the exacto-knife, create five marks for five petals.
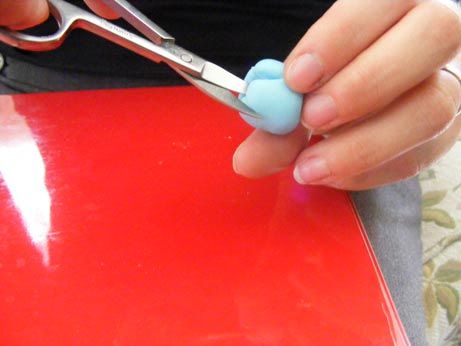 Using the cut marks, cut the petals. Make deep cuts, leaving only a small part at the bottom of the flower to grasp.
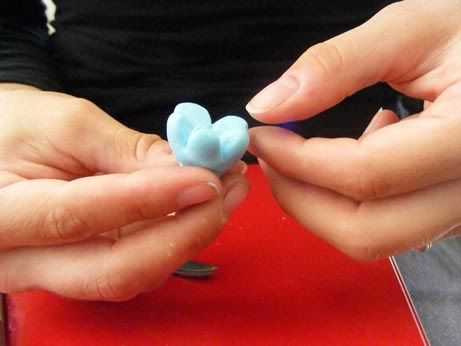 Next, peal back each of the 'petals' from the flower. It will be like a chunky prism shape. Pull them straight out.
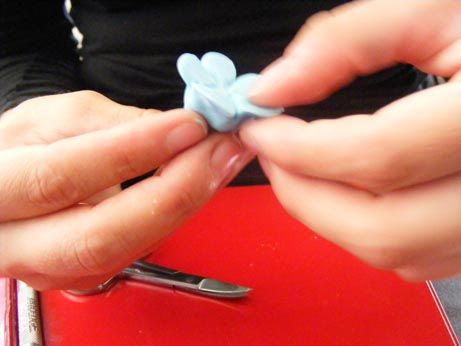 Next, using your fingers, flatten each petal until it is thin, but stable. At this point, if you had tools, you could use a ball tool and make the edges soft and curvy. Since this is a tool-less tutorial, I will just pinched the edges.
 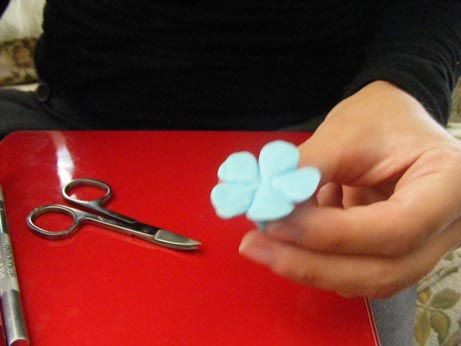 It will look like this.
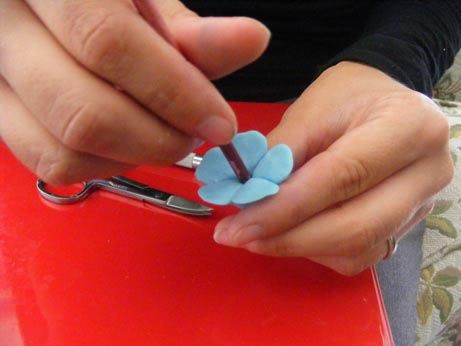 Next, using the paintbrush again, redefine the center hole. This is where you will put the pistil.
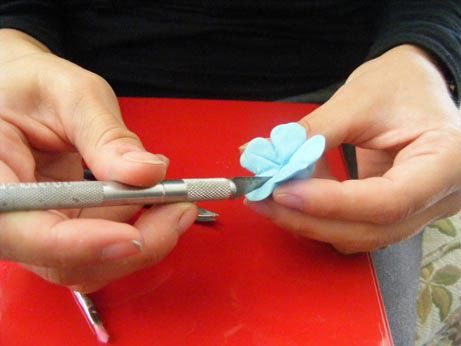 Almost there! Now, using the exacto-knife again, press a line into the middle of each petal. This is going to give the flower more definition and will be where the luster dust will gather.
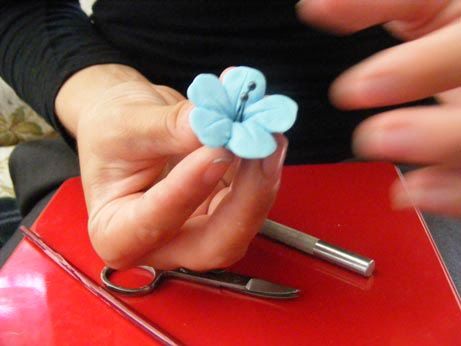
PRETTY! Now, press your pistil into the centre of the flower hole, pushing it into the fondant/gumpaste. As it dries, it will get stuck there. Let dry for an hour or so. Dust! Steaming the flower with the dust will bring out the colours and make the flower more vibrant.
Above, you can see some flat-petal flowers, and some pinched cherry-blossom style flowers. Some with black pistils, and some with white. Should you have a ball tool, you can make these flowers super pop. But, this is an easy alternative to buying an expensive tool or veneer that you don't need :)
Hope you found this helpful!
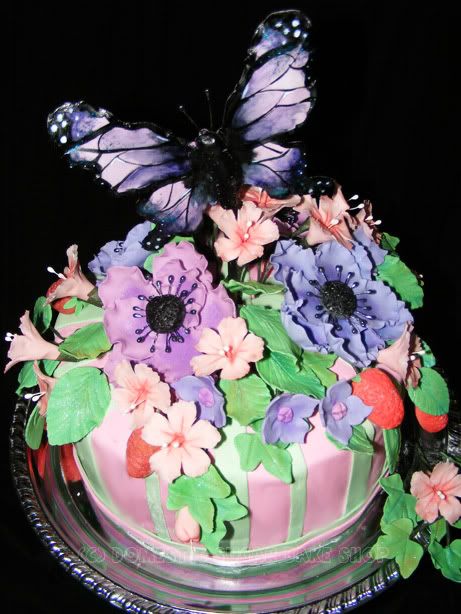
Here's a photo using both my Cherry Blossoms and my Anemone flower (Tutorial for Anemone here)

4 comments:
Brilliant tutorial! So glad you liked the pumpkins, bet the pie looked fab x
awesome how-to!!
Wow. You make it look so simple. Those are beautiful!
Amazing Love it thanks!
Post a Comment